WS2812 LEDs are one of my favourite toys. Apart from all the things that you can do with them in terms of lighting, displays or even light painting you can also use them for your projects as indicator lights.
The great advantage comes from the fact that you can use a single pin to drive so many of them and it takes just 3 wires ran across the whole box for practically any number. This in turn comes with the disadvantage of more complex control and problems driving them(5V devices) from a 3.3V microcontroller.
Although the data sheet states that you would need at least 3.5V for them to recognize as HIGH level(70% of 5V), many seem to have no problem being driven from a 3.3V micro. With the signal regeneration that each does, it is only a problem for the first one in the chain. But, as I found out, some LEDs simply don’t work as the first device, and to be safe it is best to use a level translator. Unless you completely forget about it and find yourself in need of driving a display with WS2812 which does not like 3.3V signals.
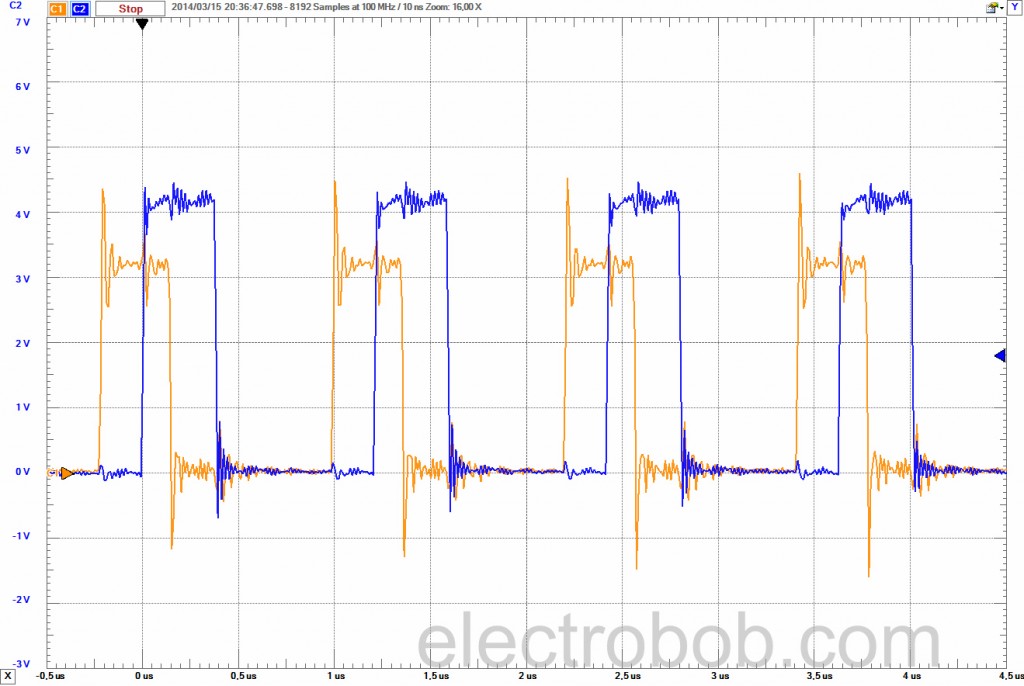
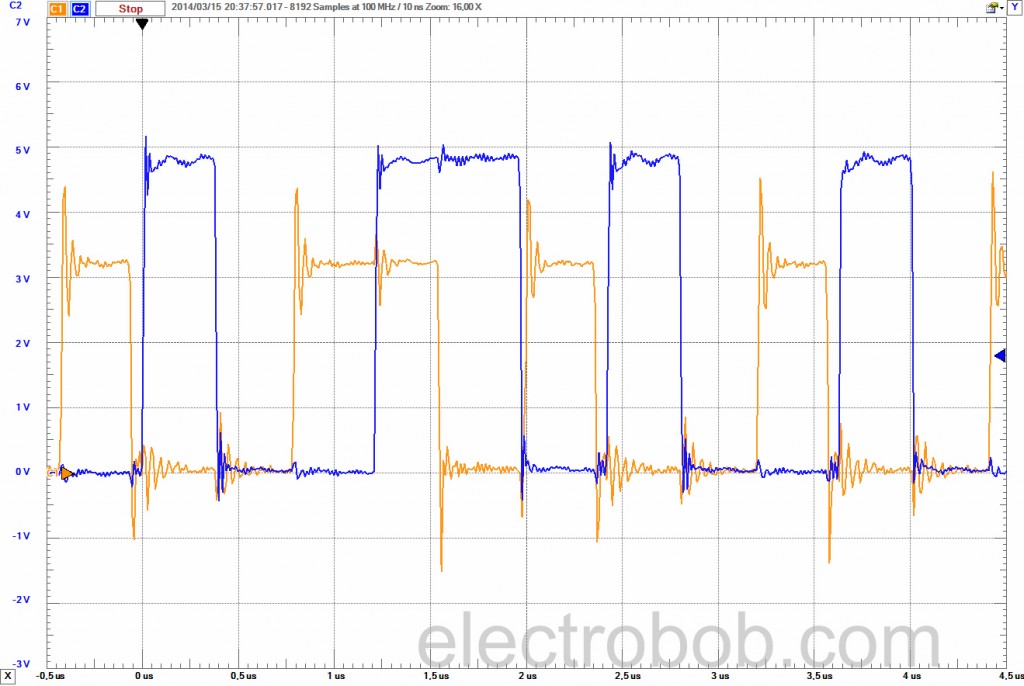
Luckily there is a simple solution with parts that you have available: just another WS2812 LED (or two) and a diode. The trick is to power the first LED in the chain from 5V via a diode dropping its supply to 4.3V*. At this level the 3.3V signal from the microcontroller is within specifications to be recognized as a high level. As each LED does signal regeneration the output of the first LED will be at a 4.3V level which is in specification for the next LED powered at 5V. If you need a longer cable between the microcontroler board and the LEDs, a second one may be included in on the board which will be supplied by 5V in turn regenerating the control levels to 5V.
Below you can see the original 3.3V signal and the 4.3V signal after the first LED. Also notice there is stronger ringing on the 3.3V control signal due to longer wire from the microcontroller.
And now the original 3.3V signal and the 5V signal after the second LED:
*Datasheet doesn’t specifically say what is the normal supply range for these LEDs, although many specs are provided for 4.5 to 5.5V supply. I found no problem with them at 4.3V in normal ambient conditions.
Update:
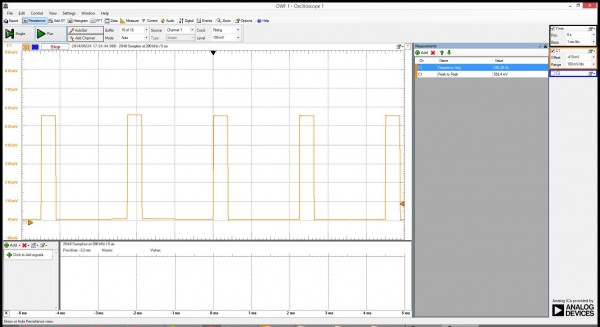
I decided to test the frequency of the PWM signal used in the LEDs as it seems to be unclear. The datasheet claims “scan frequency not less than 400Hz/s” but there was doubt whether or not this is the PWM frequency on some forums. With a resistor in series with the power supply I turned on only one color and tested the PWM frequency which was around 44oHz for a few of the LEDs that I looked at.


Here is another simple method : connect your 3.3v swing output via a diode and pullup resistor to 5v.
The connection between diode and resistor will swing from 0.7 to 4.0V (the same 3.3v swing, but raised by the 0.7v over the diode)
Vlow = 0.7V, well below Vlowmax of 0.3*5 = 1.5v
Vhigh = 4.0v, well above Vhighmin of 0.7*5 = 3.5v
Much simpler than a transistor or level shifter and 100% within spec.
Yes, it should work. That is a good idea too.
Interesting approach. I’d love to see a scope trace of that solution, with various pullups. The low side is simple enough, but on the high side the output pin would be pulled towards 4.3v by the diode and pullup resistor, which is above the typical output rating of a 3.3v uC pin. However the current might be small enough not to matter.
What size of pullup resistor do you use?
English please!
I’m always using one LED on my boards, and I used to
power LED with 3V3 and drive them with 3V3 or
power LED with 5V and drive them with 3V3 out of the box
I never had any problem doing both but I do not refresh it often but this diode solution is a great idea, between both level shifter and 3V3 drive, very nice trick thanks to share
For most cases it is the same for me, it works directly.
But that is different from it works on all cases all the time.
Sorry, but those solutions are a bit ridiculous….
The best solution, is use a fast Mosfet to convert the 3.3v from micro to 5v.
No, the solution is not ridiculous because it uses parts that you have already available. Using fast mosfets to make a level translator will take more space than an LED.
If you do it with a BS170 and 2 Resistors, then you do not use more space.
I really like your solution.
I have also used a 74LVC1T45 , a SOT23-6 package.
Indeed, those things are small as well.
Another option would be a pullup if your MCU I/O is 5V tolerant. If not you could use a pullup and simple voltage divider. Yet another option is to raise the MCU’s ground to 0.7V and drop Vcc to 4.3V with diodes on both sides.
Pull-up is a good way if the micro supports it. I would avoid ground shifting in general, though.