Intro
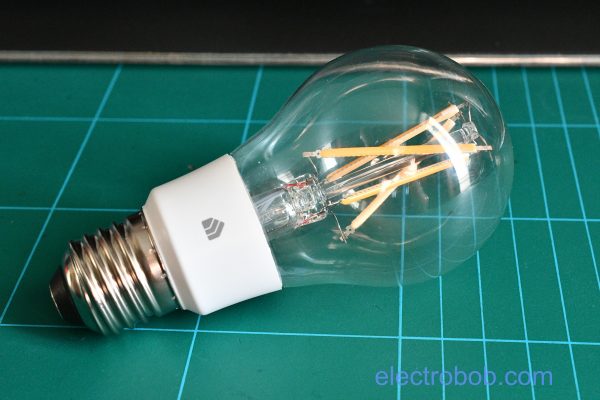
When I saw this KL50 wifi light bulb on sale, I thought I want to grab one and see what is inside. A quick search revealed no details about the insides of filament WiFi light bulbs.
Short review
The light worked well from the start, discovering and connecting it through the WiFi was straight up. It does what it promises, quite a nice diffuse and rather warm light. I have slightly colder lights in the house (the typical 2700K), but do see the appeal to such bulbs in certain applications.
The power meter says it consumes 0.4 W idle and 6.8W at full. At 1% (the minimum setting in the app) it burns 0.6W. The 0.4W sleep power consumption is decent, it is right there with the other Ikea lights that i have. The 1% minimum dimming is decent as an always on light in a hallway or something, similar to how i use my LED strips in a few places.
Tear down
I did not use the light that much, i was more curious of what was inside. So let’s start
The large metal thread was easily removed with a screwdriver by poking around the top side
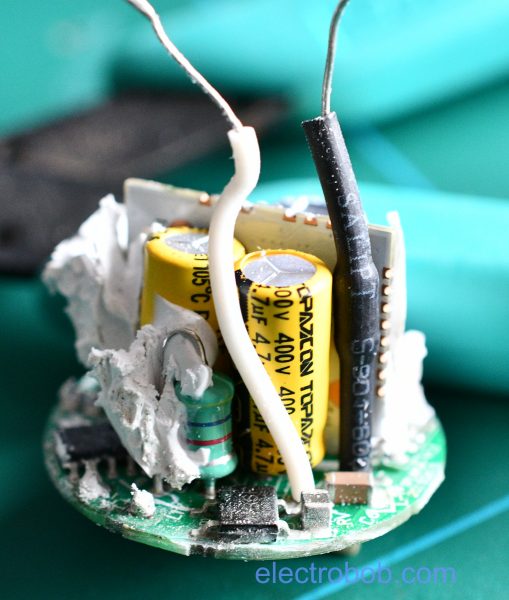
Some cutting later the electronics are out.
The WiFi module is in the middle, and around it there is the power supply and LED driver.
The power supply has two 4.7µF / 400V electrolytic capacitors and on the other side there is a 470µF 6.3V one. I suspect the output is 3.3V. There is no trace of a transformer, just an inductor. The power supply IC is labeled BP8516 which I cannot find info about. However, a BP8519 exists and it’s datasheet says we are dealing with a Non-isolated Offline CV Converter which seems right what is needed here.
The filament LED driver IC is a SM2123 which can drive 2 filament strings up to 8W each and can accept a PWM input. Indeed, the 4 filaments are connected 2 each in series and with 3 wires to the board.
The WiFi module is interconnected with 3 wires only
Based on the connections to the 6.3V 470µF capacitor it was easy to determine which are the supply wires and which is the PWM output. I cannot figure out what part number the module has, but of course I opened it
Inside there is a MT7682 WiFi SOC (WiFi, ARM processor, RAM, Flash) . I could quickly get is up and running with a 3.3V supply and an LED at the PWM pin.
The current consumption is about 33mA once it starts and connects to the WiFi, which is about half that of the ESP8266. That means the SOC burns 0.1W but the whole bulb draws 0.4 W from the grid, which shows that in this mode the power supply is not that efficient. Hard to say how much the LED driver draws, there is a 0.18mA number in the datasheet which comes up as 60mW, but the rest is probably due to how inefficient the power supply is at this load.
Thoughts…
The light bulb is quite efficient. Standby power is comparable to Ikea lights which use much lower power zigbee radios, but I think the 0.4W is still quite a lot, because one day of standby is almost 1,5 hours of full ON. So if you consider the typical 3h per day usage, this light will consume 50% more energy than a dumb one, assuming you keep it always on and control it via remote. Still, it could be worse, as this study has shown.
The standby power consumption is not reported on the product page, or in the product datasheet.


I hta question about a light bulb I found in a house I just moved in to if you could email me asap id love to send some pictures of what was inside of it please email me at your earliest convenience thank you
Pingback: ICYMI – Adafruit IoT Monthly: CO2 Cuckoo Clock, Wippersnapper, and more! #IoT #InternetofThings #Microcontrollers @adafruit @adafruitio « Adafruit Industries – Makers, hackers, artists, designers and engineers!
Pingback: TP-Link KL50 smart light bulb teardown @electr_bob « Adafruit Industries – Makers, hackers, artists, designers and engineers!
Maybe the BP8516 is from the family of BP3126?
https://pdf1.alldatasheet.com/datasheet-pdf/view/1132007/BPS/BP3126.html
Hey Miron, there is already the SM2123 which is without a doubt the LED driver. So it makes more sense the BP8516 is some sort of DC/DC power supply, similar to the BP8519. The BP3126 which you are mentioning also needs a transformer, and there is none around.
Pingback: Ikea TRÅDFRI review – Electro Bob